
Optimizing Aerodynamics for Hydration and Nutrition in Triathlon
As I prepare for Challenge Roth 2025, one of my main focuses is ensuring my hydration and nutrition strategy is dialed in while maintaining optimal aerodynamics. So I went exploring. 🧐

Aerodynamics plays a crucial role in triathlon, especially for long-distance events like Ironman, where every watt saved can translate to significant time gains. One of the most debated aspects of bike setup is the placement of hydration and nutrition to balance aero efficiency and accessibility. This article dives into scientific findings, real-world testing, and practical applications to help you optimize your setup.
Over a full-distance race, small changes in bike setup can make a significant impact on overall performance. The insights shared here are not just theoretical but directly applicable to my training and race execution.
The Science Behind Aerodynamics and Hydration Placement
Research in aerodynamics has shown that improper bottle placement can add significant drag, increasing energy expenditure. Wind tunnel and real-world tests indicate that optimal positioning can save up to 5-10 watts, depending on setup choices. So it is important that both hydration and nutrition are placed correctly to avoid any potential losses.
A study by Specialized’s Win Tunnel and AeroCoach tested different bottle positions on time trial (TT) bikes:
1. Between the Arms (BTA)
Advantages: This is often the most aerodynamic choice, reducing frontal drag and keeping the hydration within the rider’s natural wind shadow. It allows for easy access without requiring the athlete to sit up or reach too far.
Example: The Profile Design Aero HC system and XLab Torpedo systems are designed specifically for BTA positioning, ensuring seamless integration with aerobars.
Best For: Athletes who want quick and easy hydration access without compromising aerodynamics.
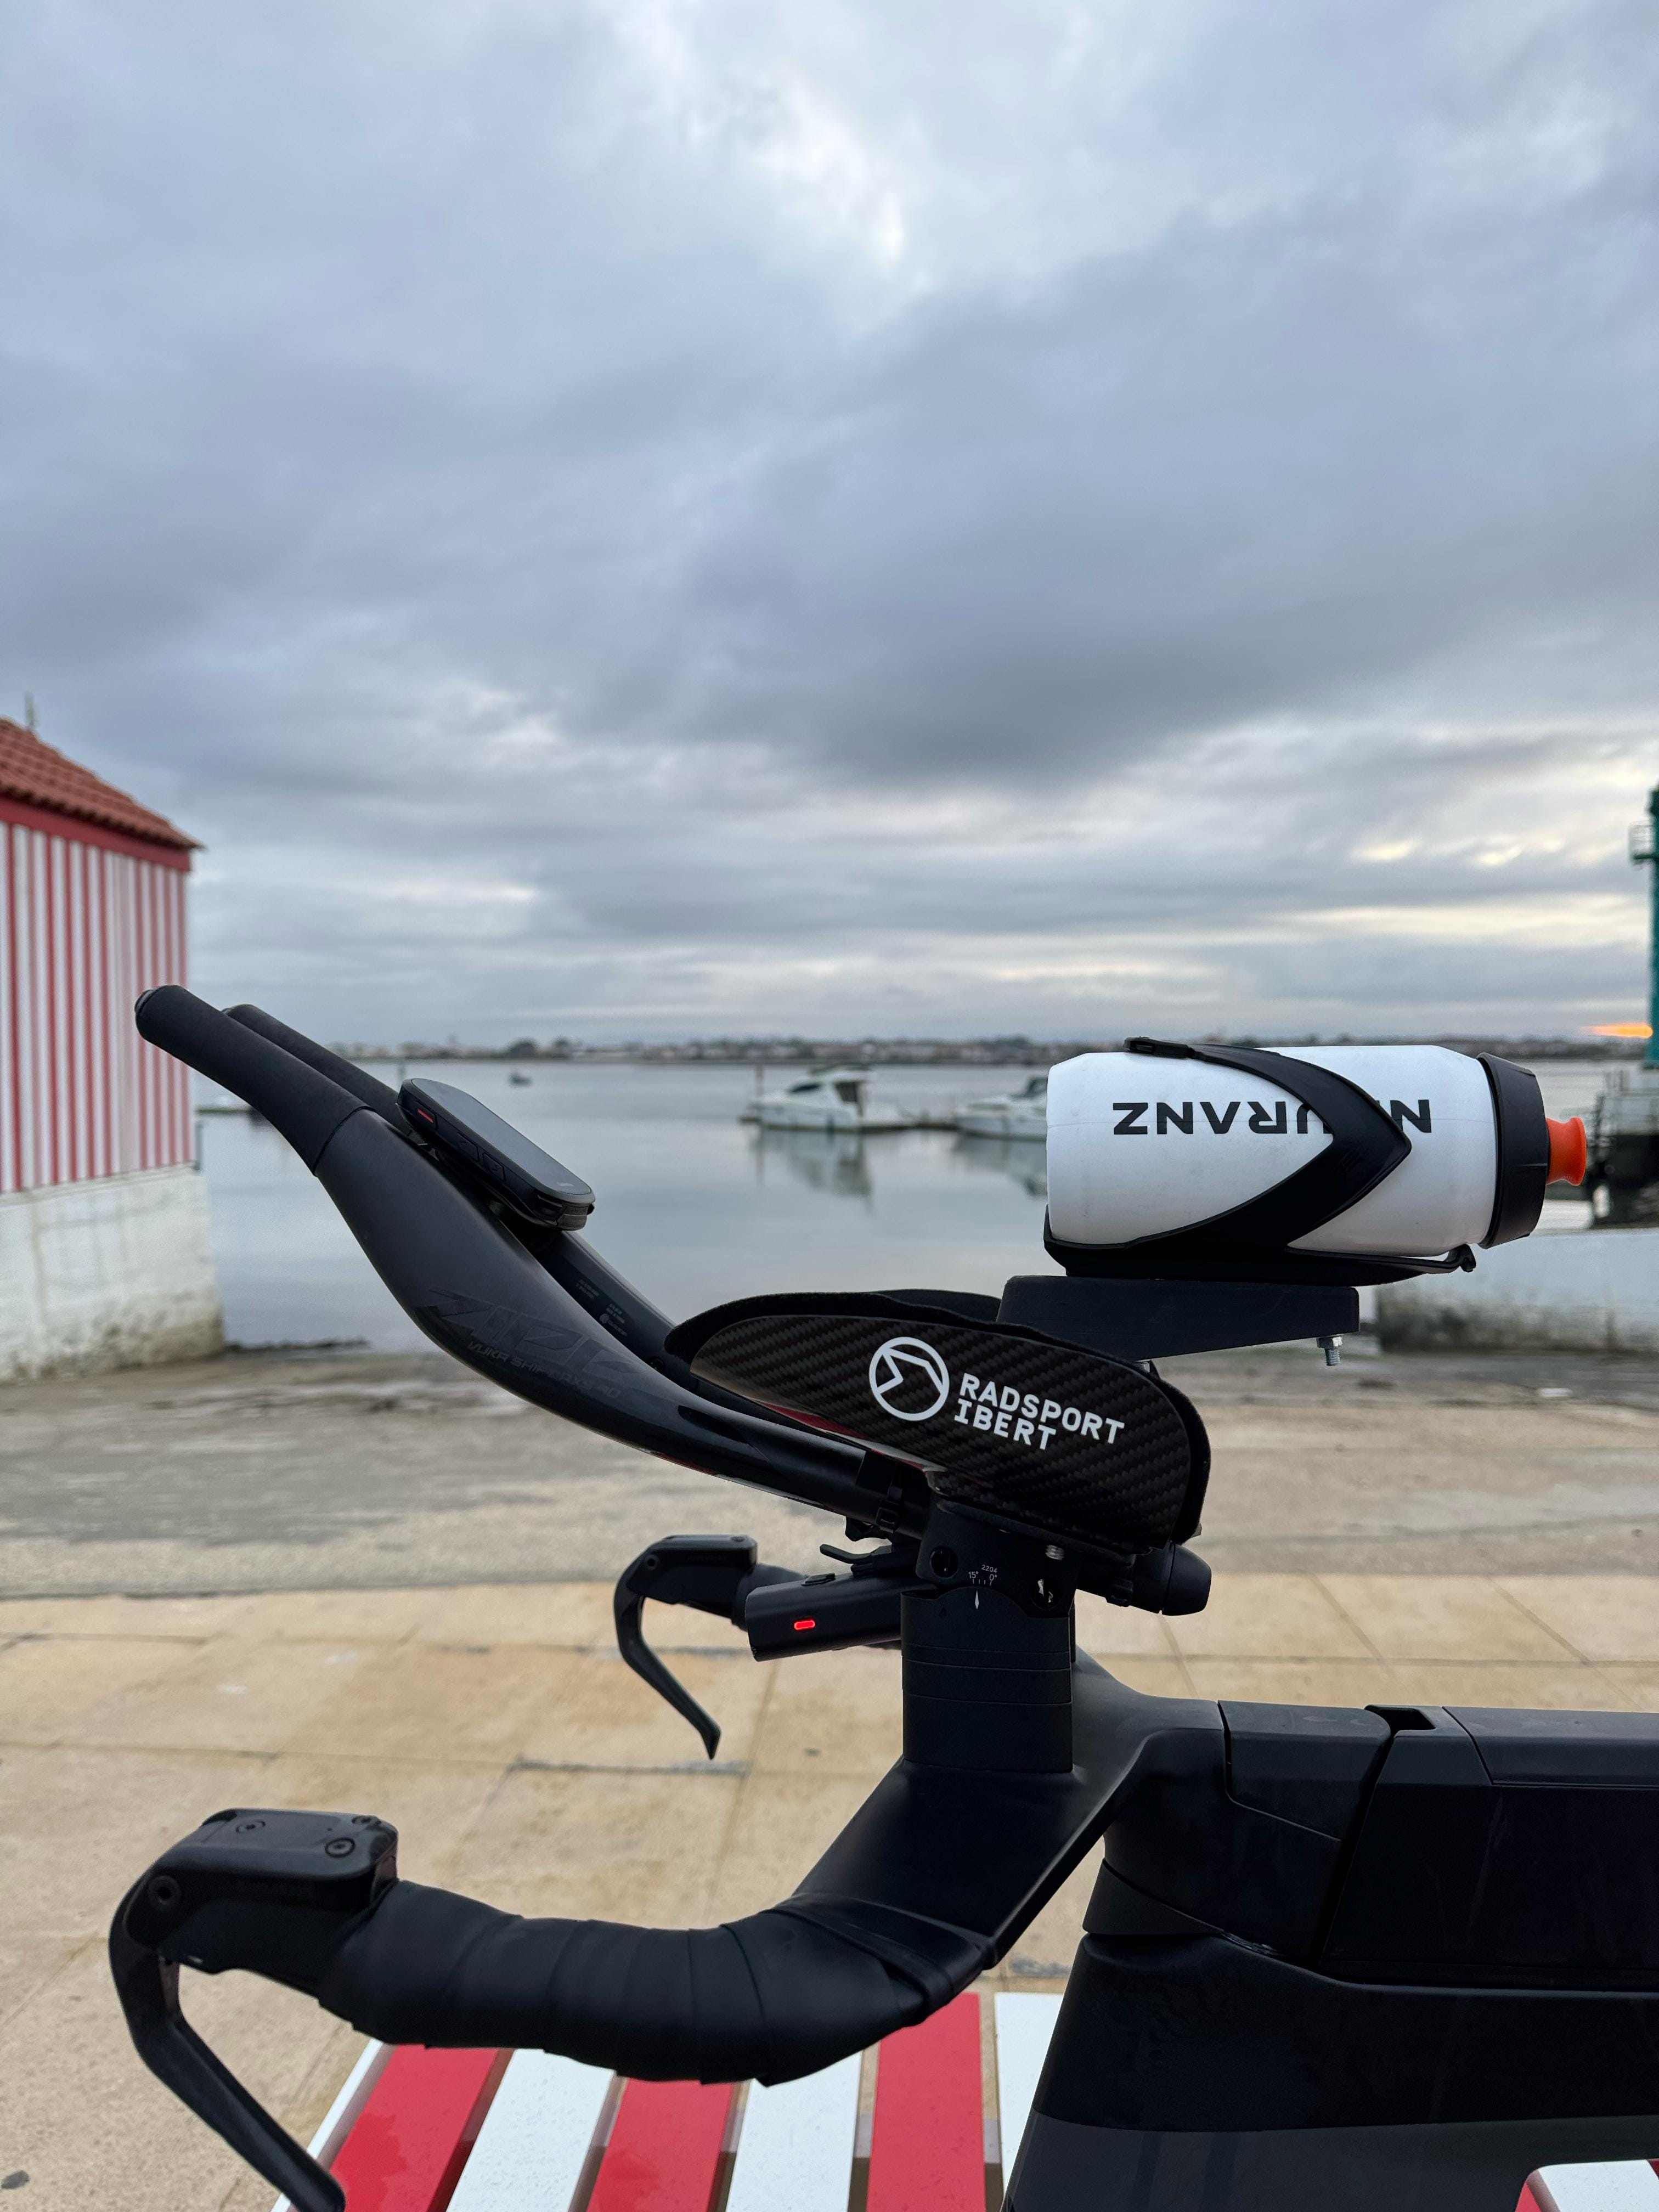
BTA with a 750ml bottle will be my primary choice for Challenge Roth, as it allows me to stay in aero position while easily hydrating during long stretches on the bike course. I also have 500ml of hydration inside the frame, which is already setting me up to 1250ml. Currently exploring this setup (the picture is from a friend’s bike).
2. Frame-Mounted (Down Tube/Seat Tube)
Advantages: While traditional round bottles create moderate drag, aero-specific bottles (like those from Elite or Specialized) integrate better with frame aerodynamics.
Example: Cervélo’s P-series bikes feature integrated hydration options designed to reduce turbulence when placed correctly on the frame.
Best For: Athletes who need additional hydration without disrupting their aero position.

I never got well with this solution since the bottles are kept in place by magnets. I know that people use it with rubber bands also but to me they bring a lot of hassle and there are better options. I will keep this option in mind if I feel that I need it.
3. Rear-Mounted (Behind the Saddle)
Advantages: If positioned correctly, rear-mounted bottles can be fairly aerodynamic, even beneficial. When bottles are tucked low and close to the rider’s body, they can stay within the airflow shadow.
Disadvantages: Improper placement (such as mounting bottles high and wide) can create additional drag and negatively impact performance. Additionally, rear-mounted bottles are prone to ejection on rough roads.
Example: XLab Delta and Profile Design RML are designed to keep bottles secure and aerodynamic.
Best For: Long-distance athletes who need extra hydration and are comfortable reaching behind their saddle.
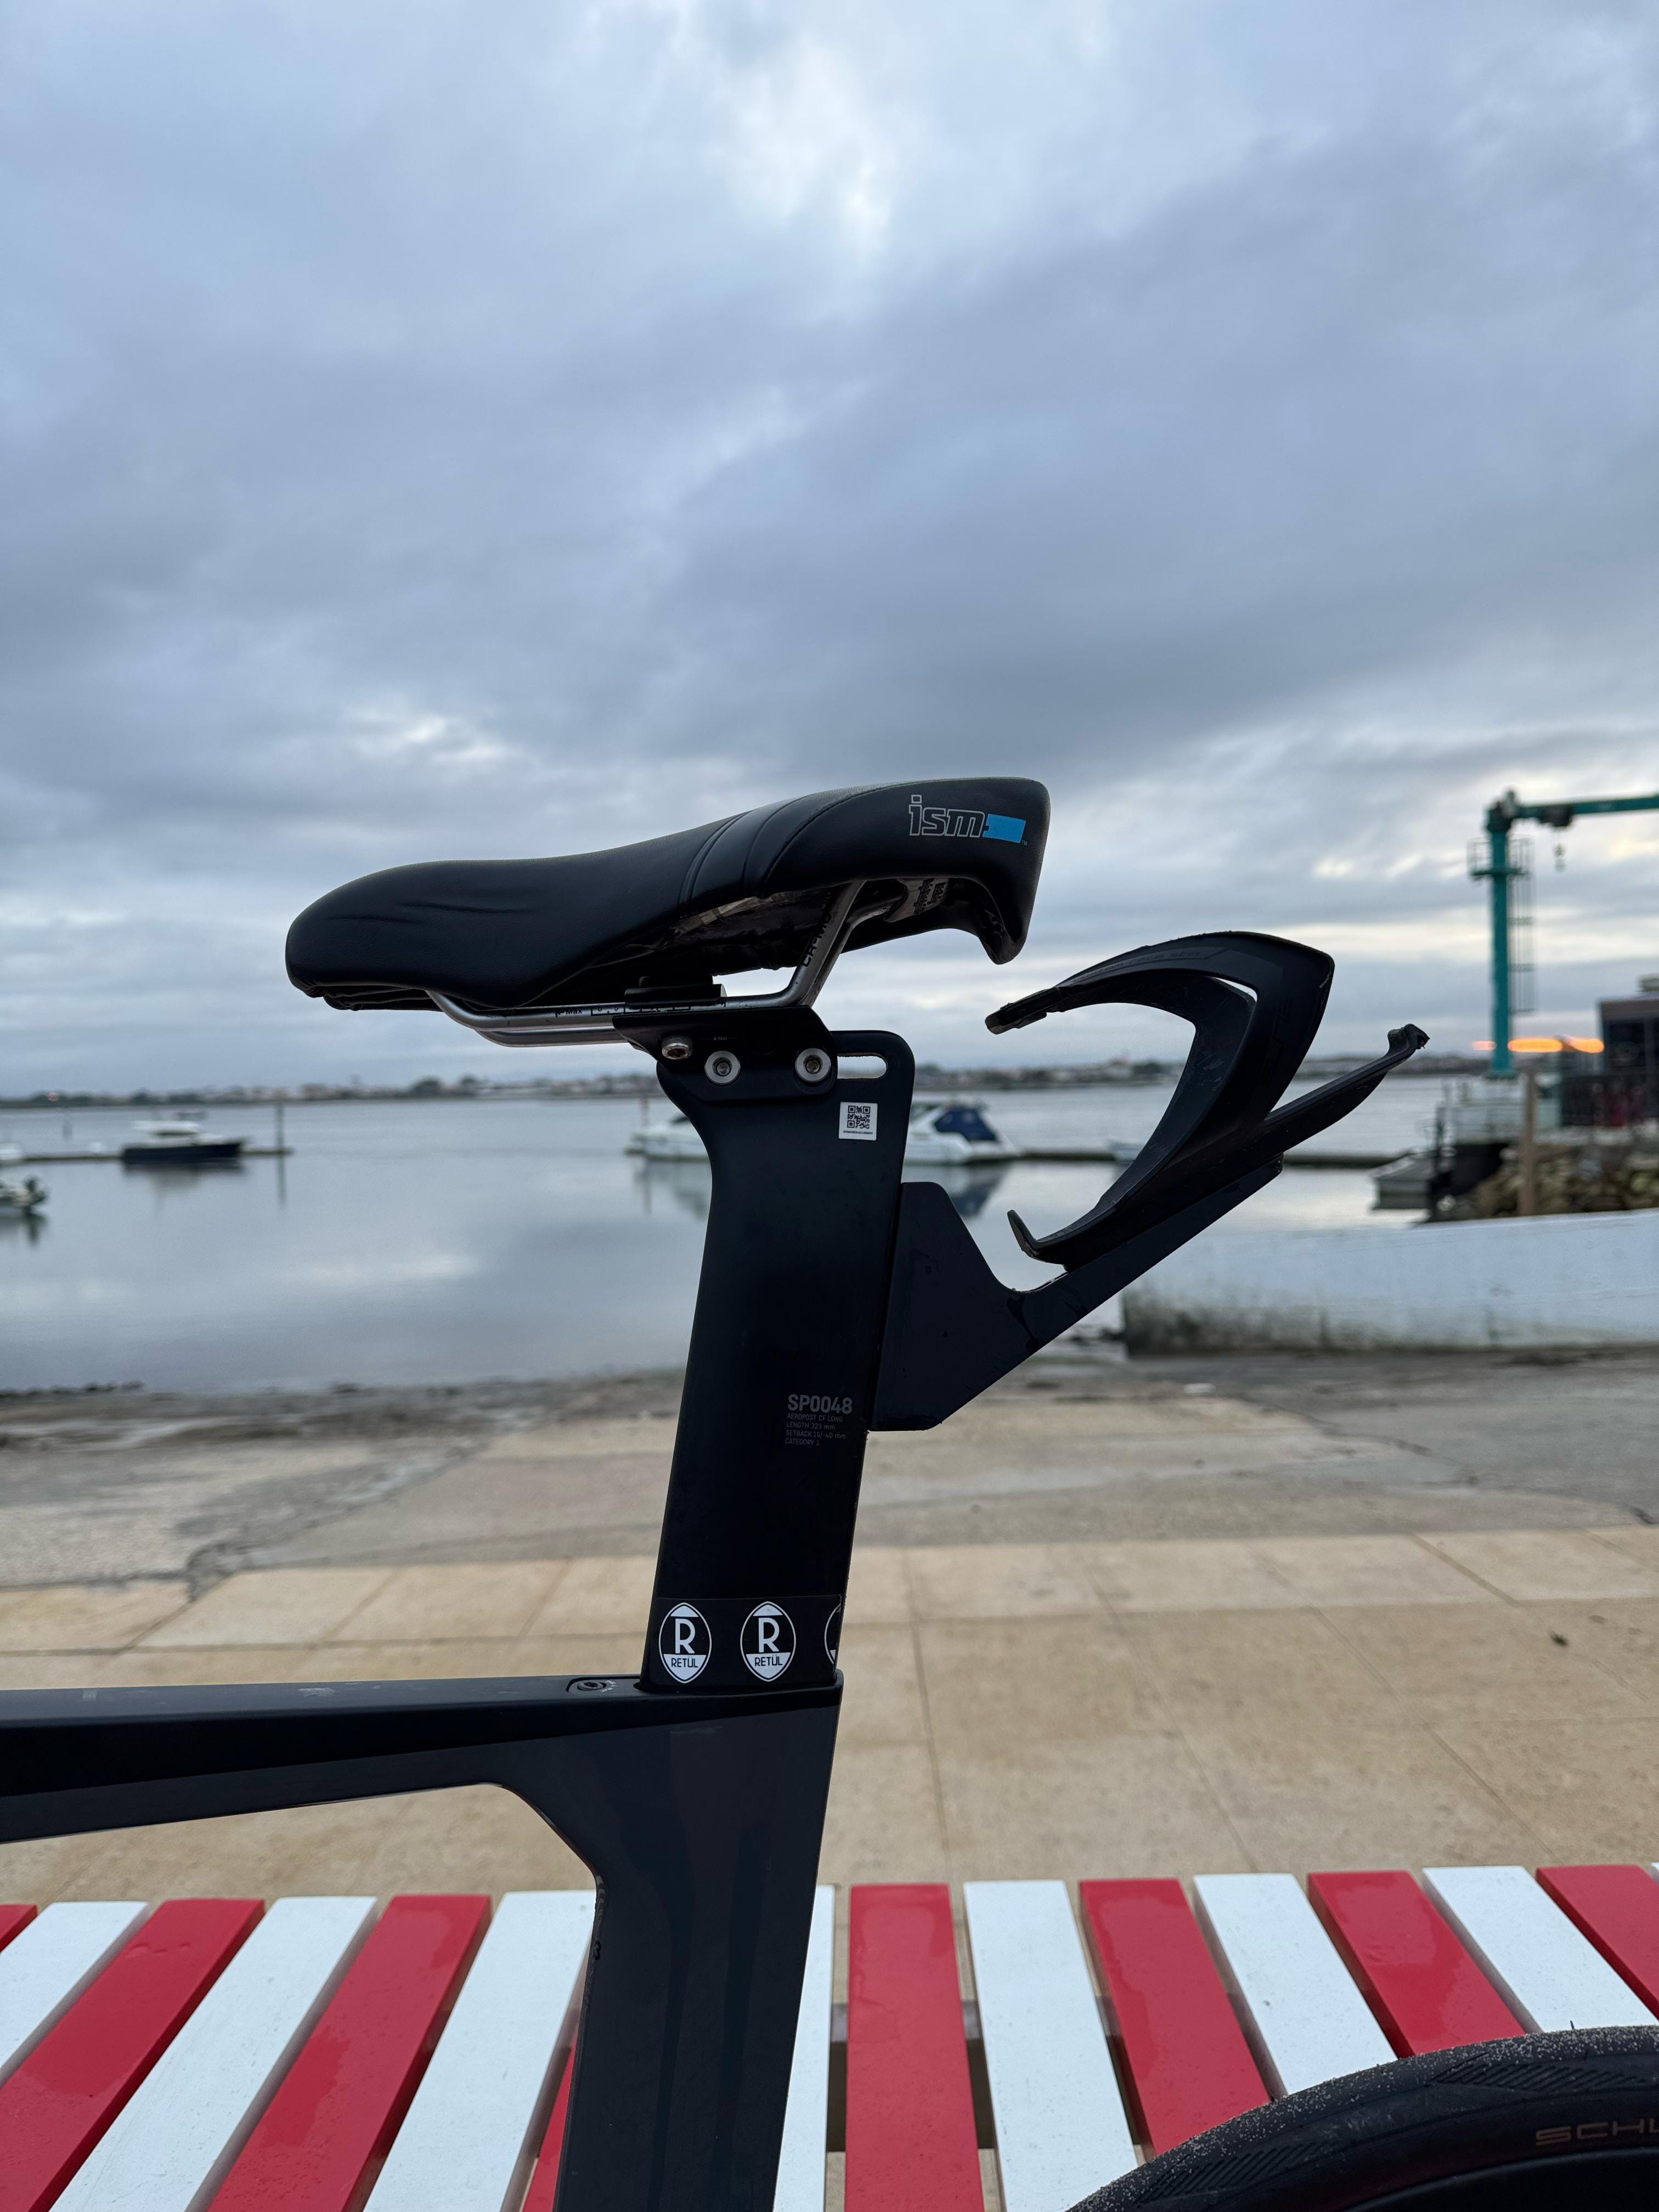
Since Roth’s bike course has rolling hills, I’m testing whether a low-profile rear-mounted bottle setup works without affecting handling or accessibility. With this option and a 750ml bottle I would have 2000ml to work with. Currently exploring this setup (the picture is from a friend’s bike).
Testing backed results: What Works Best?
Wind tunnel and velodrome tests conducted by experts like Ero Sports and Swiss Side have provided quantifiable data on hydration placement:

Practical Considerations
Accessibility: BTA bottles allow for easier access without breaking aero position, making them ideal for race conditions.
Bottle Ejection: Rear-mounted and frame mounted hydration systems often experience bottle ejection due to road vibrations.
Heat Management: In hot conditions, having additional bottles behind the saddle can be necessary despite the aero penalty.
Nutrition Storage: Aero Gains vs. Practicality
Nutrition storage is another key factor in aerodynamic efficiency. Triathletes often carry gels, bars, and chews, and where these are stored impacts both aero and convenience.
1. Integrated BTA Storage
Impact on Aero: Minimal drag, often designed to blend into the cockpit.
Example: The Speedfill Z4+ integrates hydration with gel storage, keeping everything within easy reach.
Best For: Athletes who want to consume nutrition while maintaining their aero position.
2. Frame Storage (Top Tube Frame Box)
Impact on Aero: Low drag, especially when using an aero-designed bento box.
Example: The XLab Stealth Pocket and Profile Design Aero E-Pack are specifically designed for aerodynamics.
Best For: Storing gels and bars in an easily accessible location.
My go-to strategy for Challenge Roth is to ensure I can easily grab my fuel in the frame box without breaking aero position. I have a Canyon Speedmax CF SLX and I can fit 2 gels and 2 chews in the frame box, providing me with 130gr of carbohydrates to start with. I can refill it in the nutrition stops along the bike course.
3. Jersey Pockets
Impact on Aero: Low-moderate drag, depending on how items are packed.
Example: Many long-distance triathletes store extra gels in their trisuit pockets to minimize bike clutter.
Best For: Athletes who prefer to keep bike weight minimal.
While I’ll carry a few emergency gels in my trisuit, I want to minimize reliance on jersey pockets for better aerodynamics.
4. Rear Saddle Storage
Impact on Aero: Moderate-high drag if not properly tucked in.
Example: Some riders tape gels to their top tube for races to avoid additional drag.
Best For: Long-distance races where additional storage is required.
I won’t be using a rear saddle storage.
Key Takeaways: Optimizing My Setup for Challenge Roth
Use a BTA bottle for primary hydration, as it minimizes drag and maintains easy access.
Considering an aero bottle on the frame if additional hydration is needed for long distances.
Keep rear-mounted bottles low and tucked behind the saddle to reduce drag while ensuring hydration for extended rides.
Store nutrition in a top tube frame box for easy access to fuel during the race.
Minimize clutter on the bike—every extra object increases drag and can slow us down over 180 km.
As I continue preparing for Challenge Roth 2025, I’ll be refining my hydration and nutrition strategy to ensure optimal performance on race day. By focusing on aerodynamics while keeping my fueling plan effective, I aim to maximize efficiency and execute a strong bike leg.
What’s your preferred aero hydration and nutrition setup? Share your thoughts in the comments!